The first page you see is the Dashboard

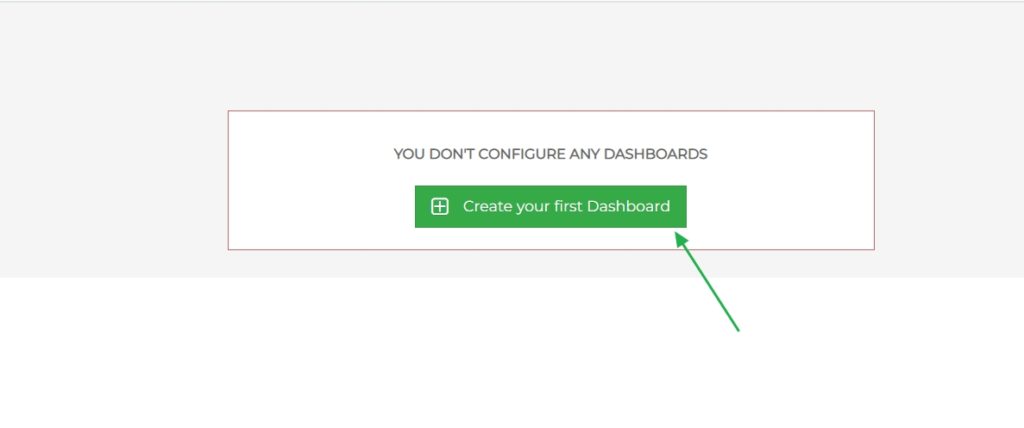
To create a Dashboard click here
To add new tab click here
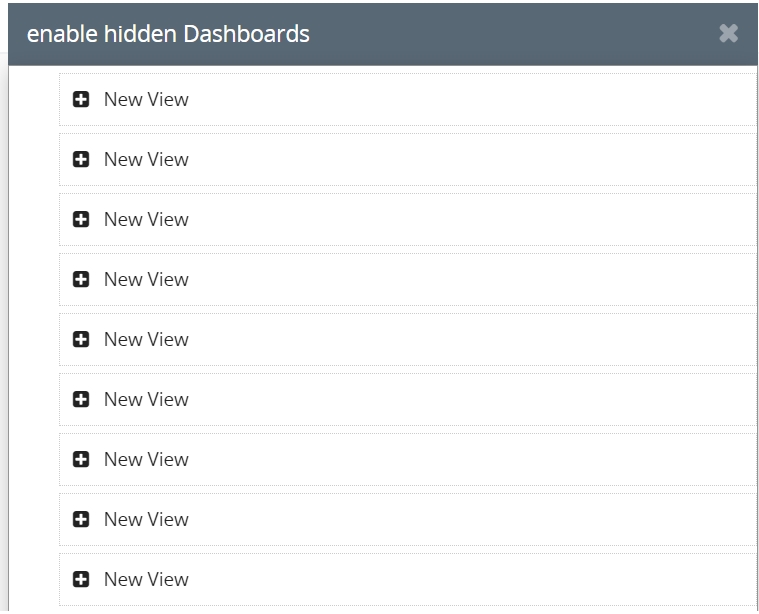
Click here to add a hidden dashboard
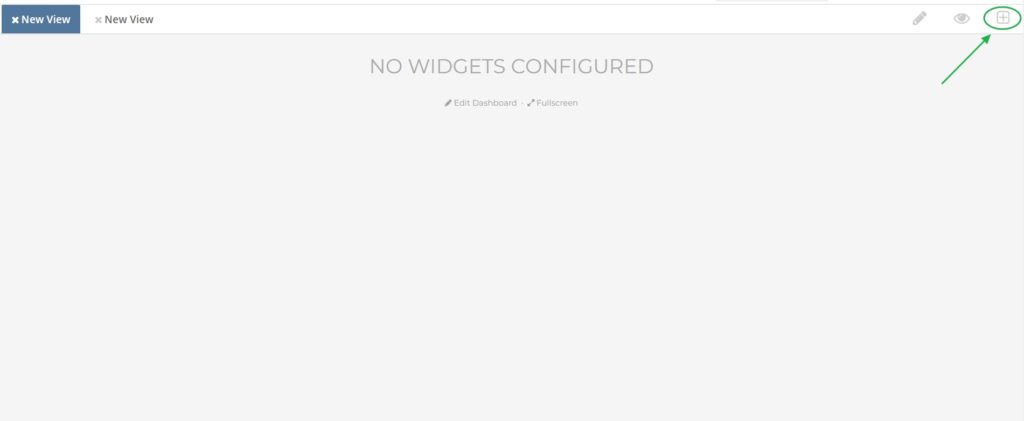
And click on “+” to add
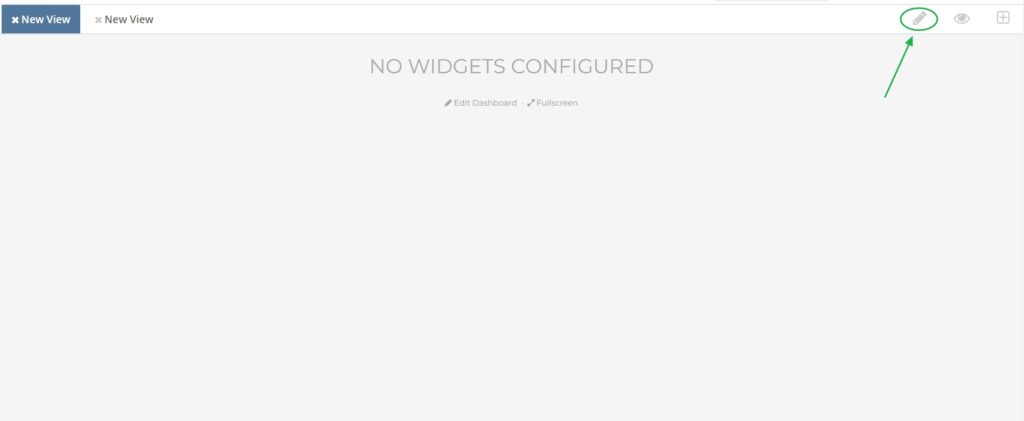
To edit the Dashboard tab click here
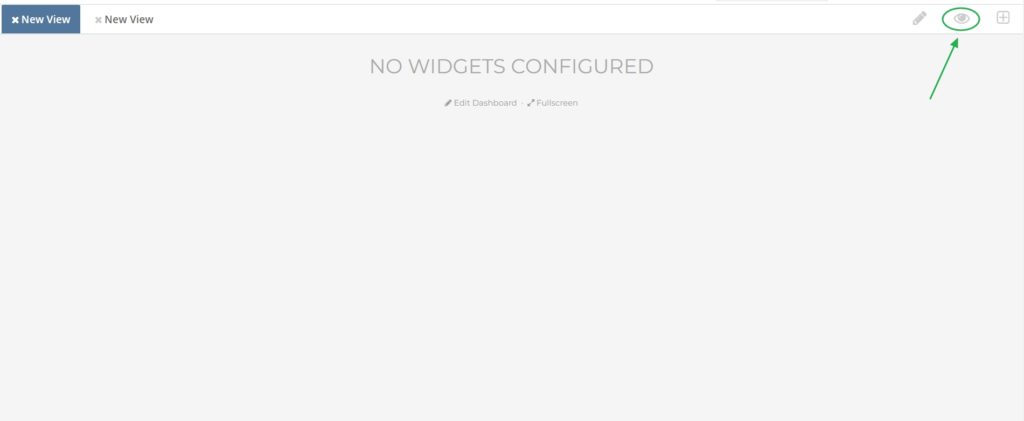
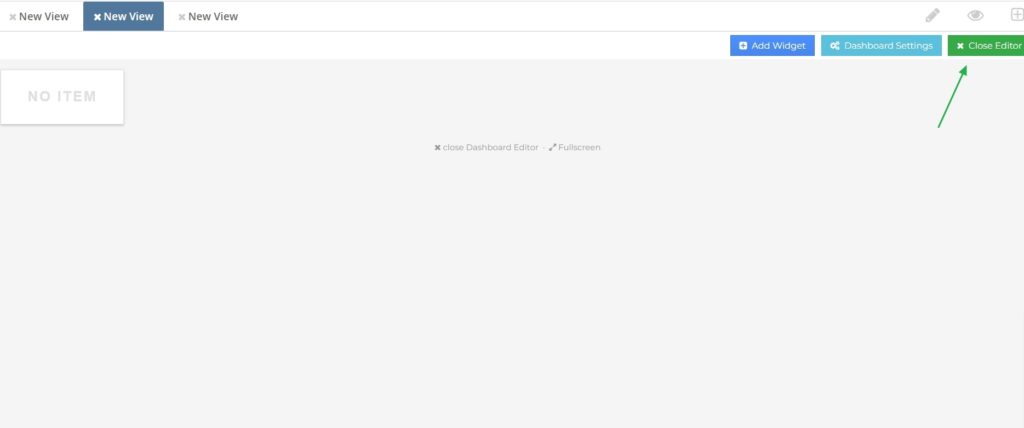
To close the editor click here
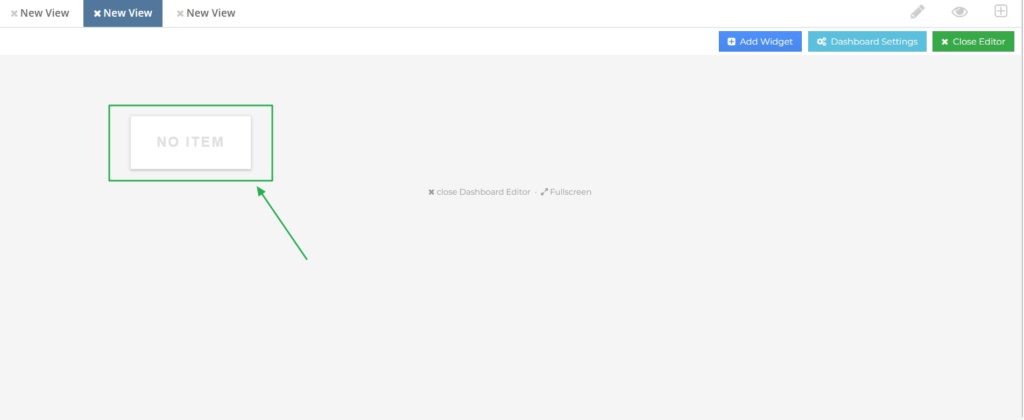
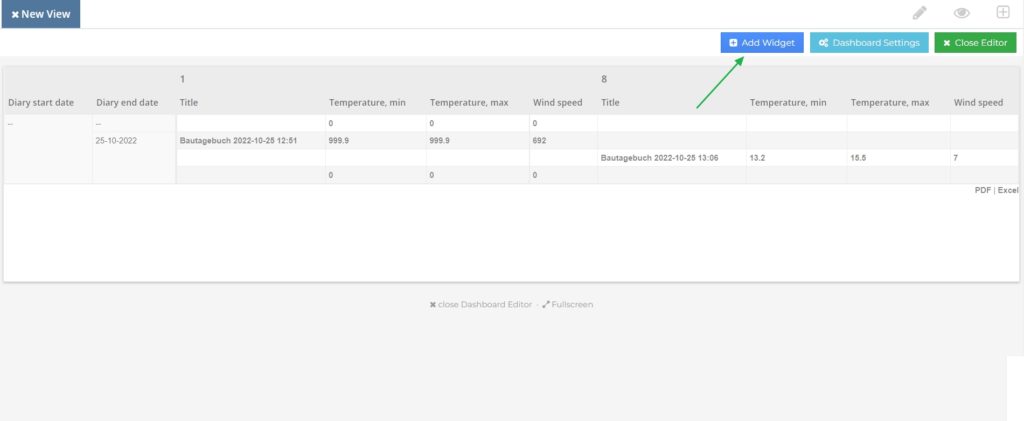
This is a widget. Here you can add the necessary module data by clicking on it
Here you can see a list of what you can add to the widget
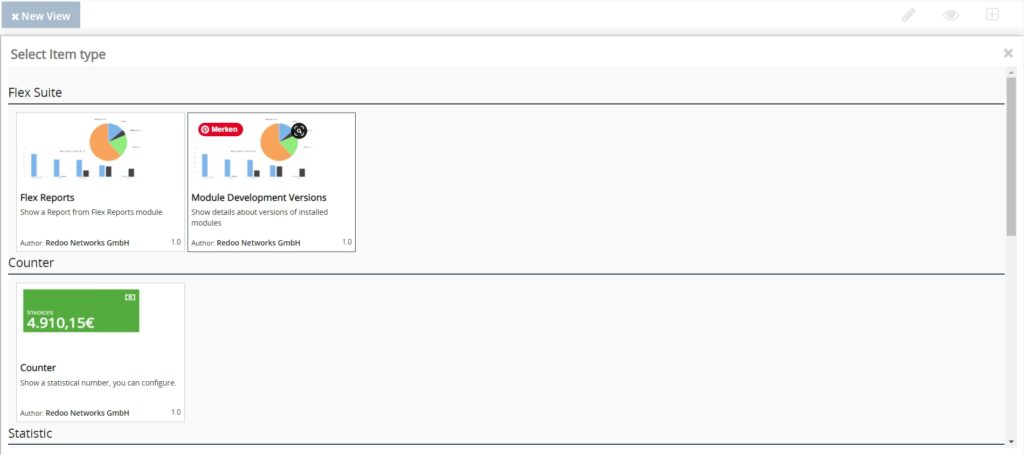
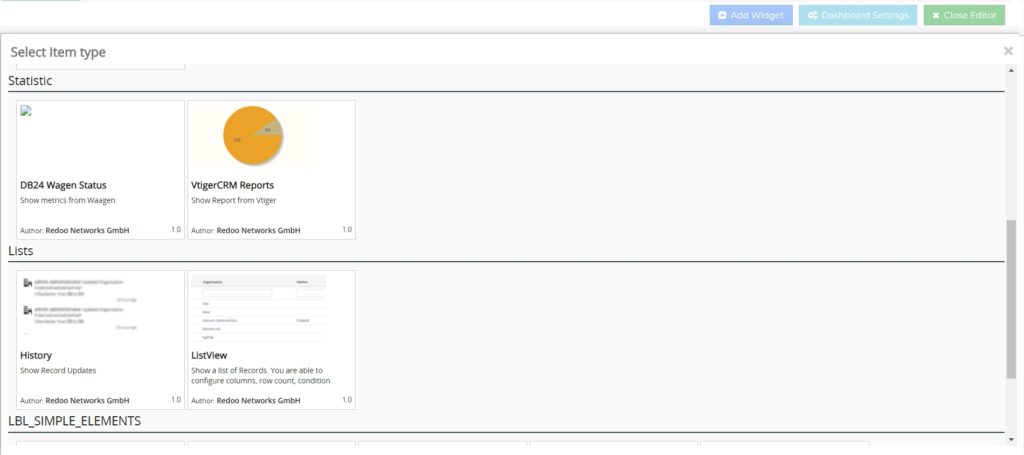
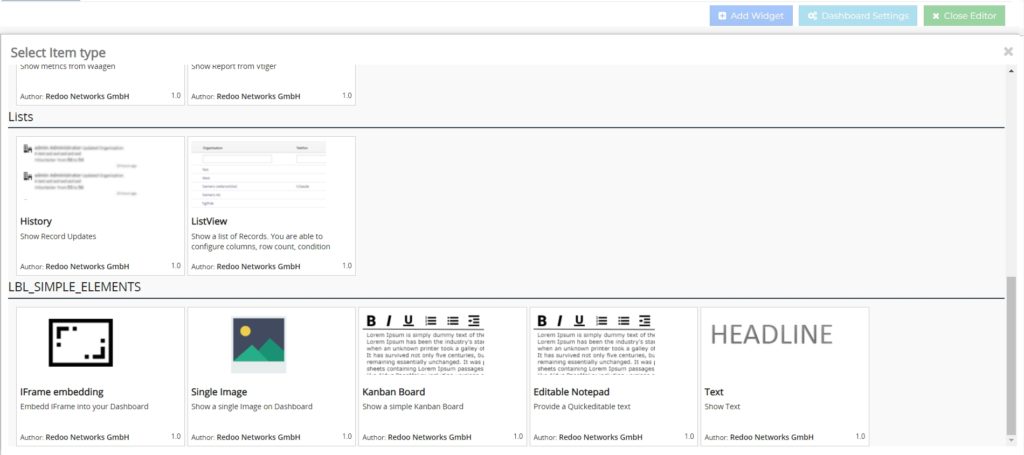
Customize the widget by selecting the necessary items and entering the necessary information

In the “Show part of Report, if configured in Flex Reports” field, select the required item

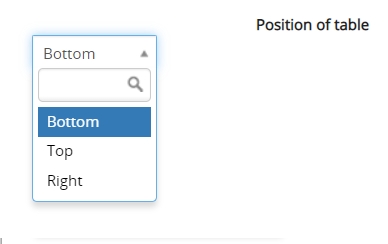
In the “Position of table” field, select the required item
If you want to reset the item click here
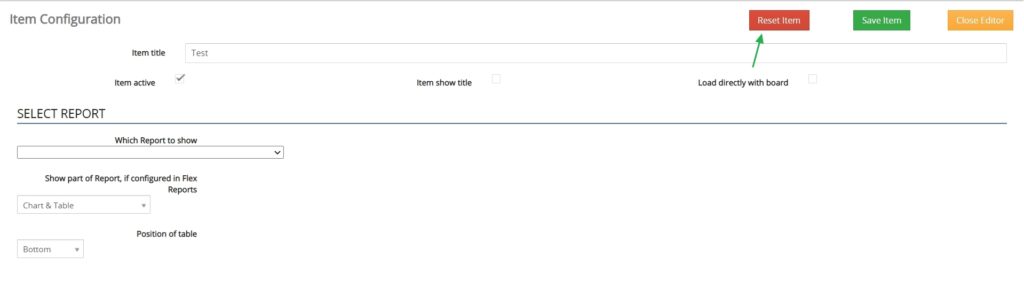
If you want to close editor click here

To save click here

To add a new widget click here
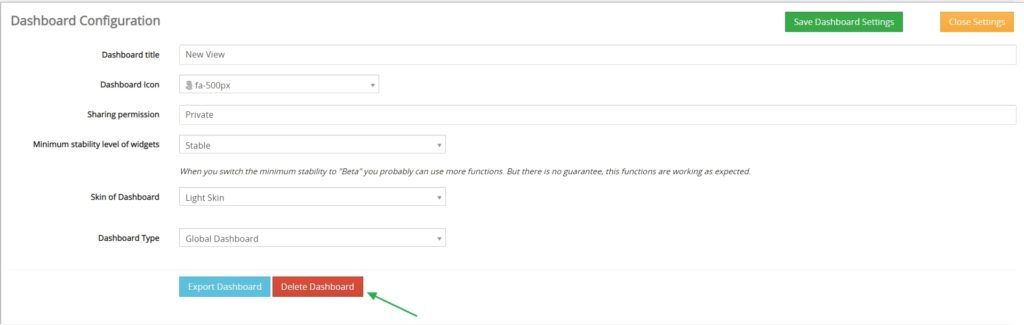
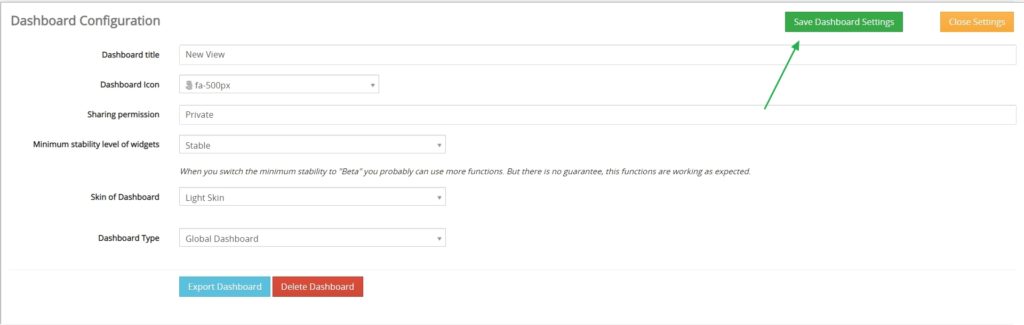
To open the Dashboard settings click here
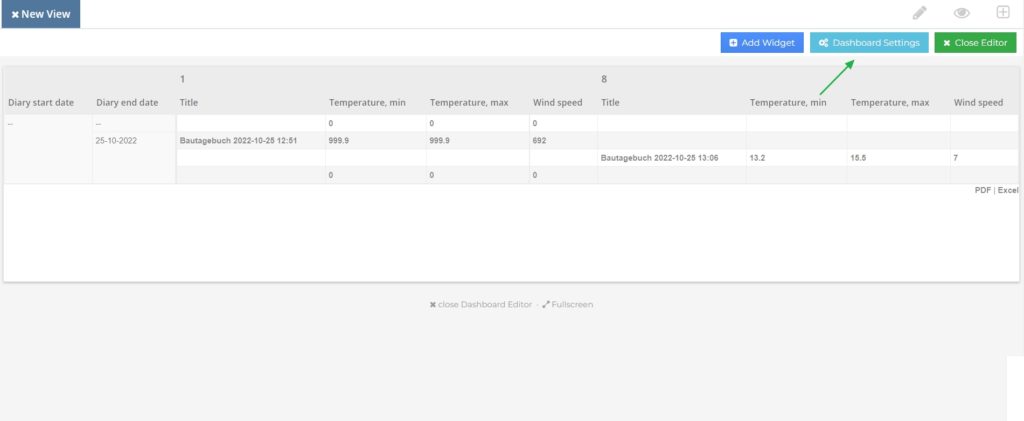
Here you can see the dashboard settings, if necessary, you can change the data in the fields

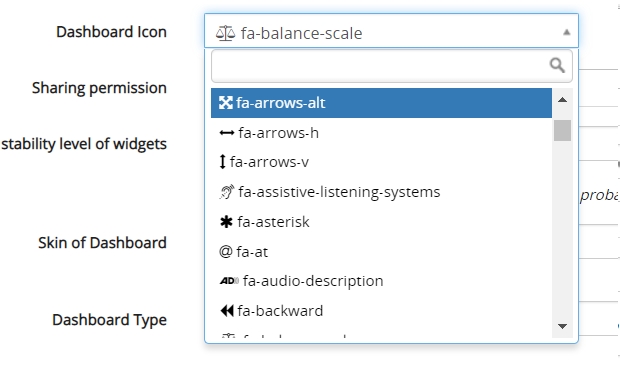
In the “Dashboard Icon” field you can select the icon that will be used to mark your dashboard
In the “Share permission” field you can choose who will see your Dashboard
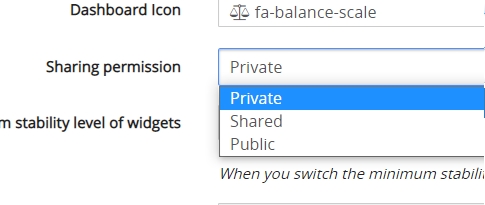
in the “Minimum stability level of widgets” field you can select the stability level of your dashboard

In the “Skin of Dashboard” field you can choose the look of your Dashboard
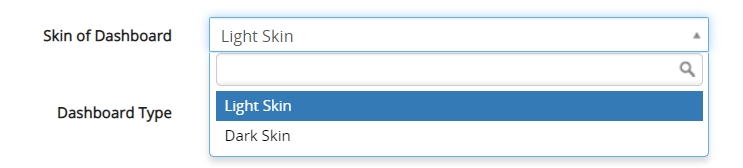
In the “Dashboard Type” field you can select the type of your dashboard
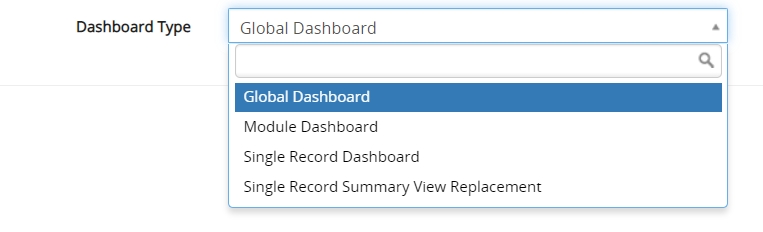
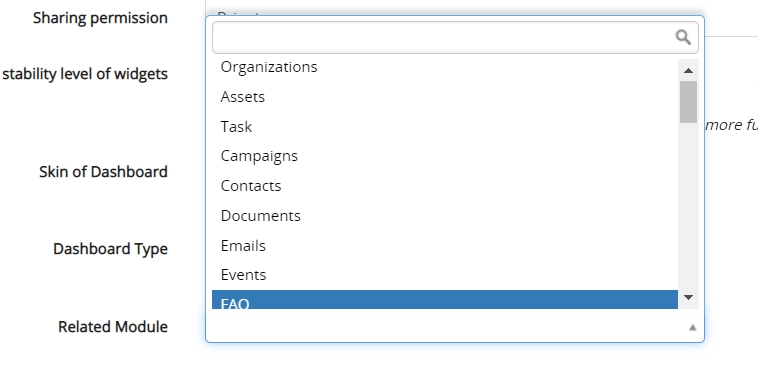
If you choose any other type of dashboard except “Global Dashboard”, then also select in the “Related Module” field the module with which your dashboard will be associated
To export Dashboard click here

To delete Dashboard click here
To save click here
Here in the left top corner you can see the list
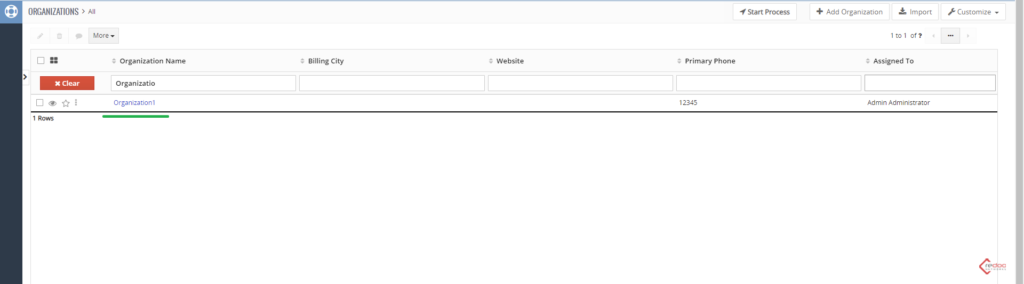
Lets move to the Organization page and see how records of the CRM are listed
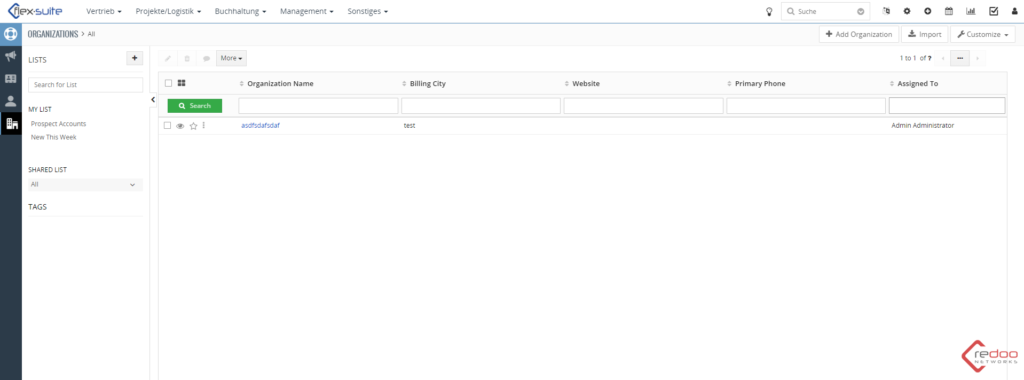
Main part of the page is a place where all records are listed
Here you can see recors’s basic information, in this case: Organization Name, Billing City, Website and Primary Phone
There is also a column where a person assigned to that particular record can be seen
The right upper section responds for adding, importing and customizing records
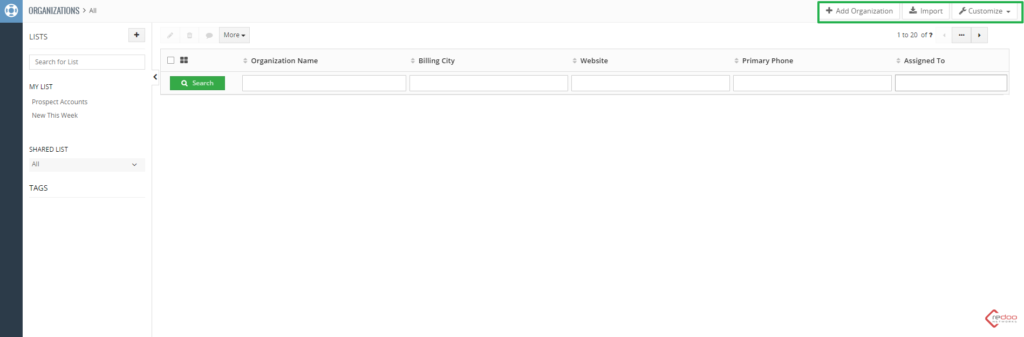
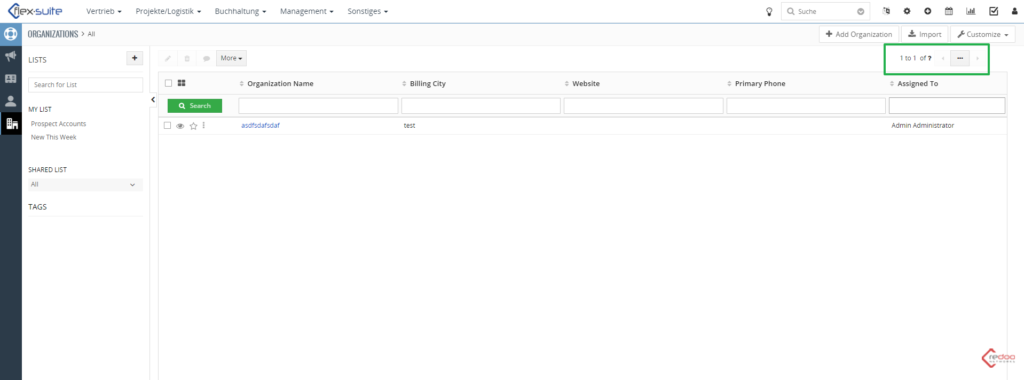
Below there is a page counter and buttons to operate the navigation between them
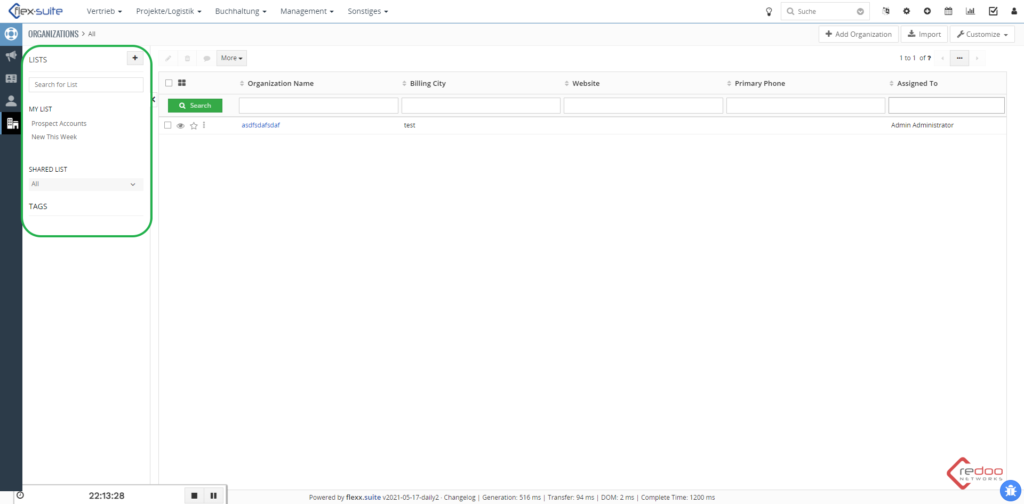
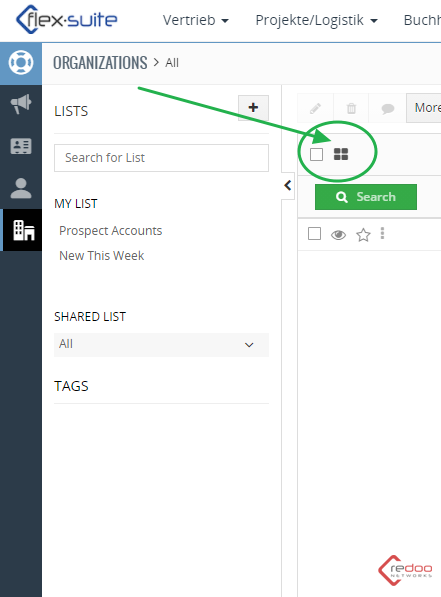
In the left corner you can view the list menu where you are able to configure a list view of the page
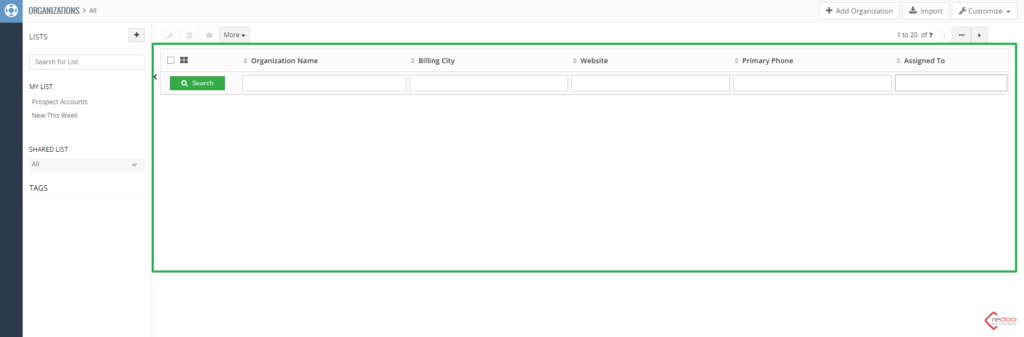
You have the option of defining lists in the area marked green. These can help you with the clarity of your orders.
You can define your lists according to various attributes, for example, the current status, the customer and many more.
To do this, click on the “+” sign in the highlighted area and create your own lists
In the green marked area you can now define your central list view.
Define your list view in the window that now opens.
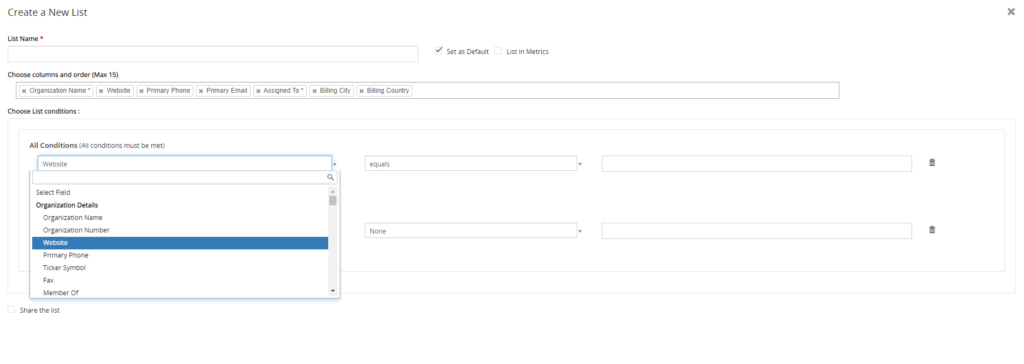
You can fill in the Listname, choose the columns with suitable for you information
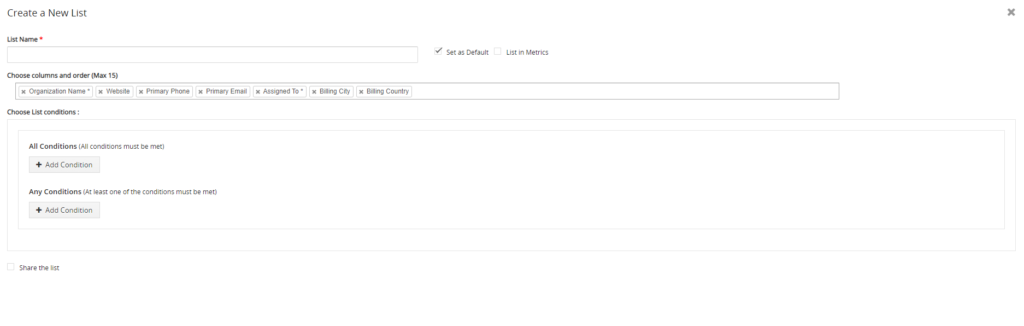
You can also add your custom conditions by pressing “Add Condition” button
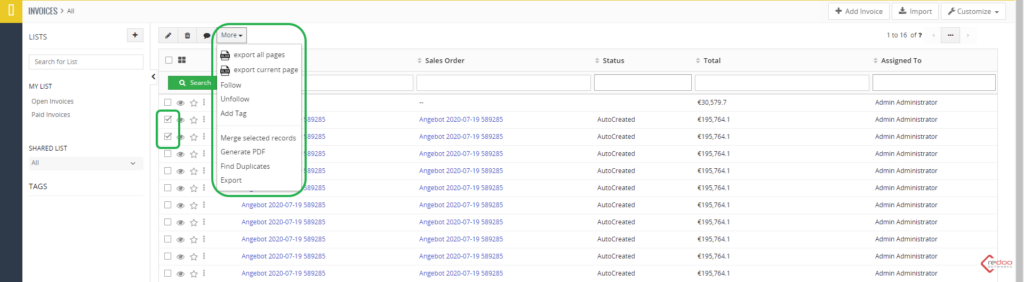
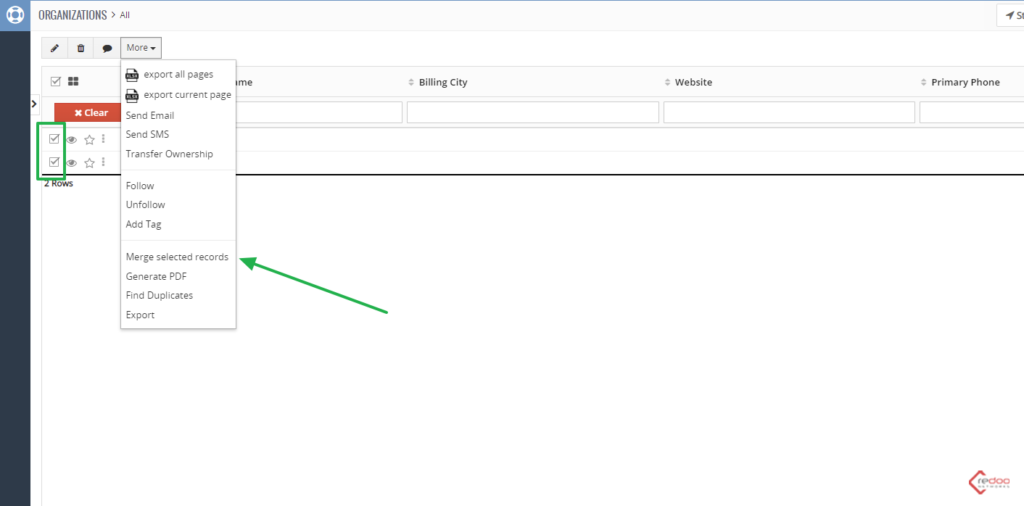
You can select a record via check mark and by pressing “More” button on the top you will see a pop up window were you can select a various available actions that you can apply to the checked records
From top to bottom:
- Export all pages
- Export current pages
- Follow – allows you to track changes in a specific record
- Unfollow
- Add Tag
- Merge selected records
- Generate PDF
- Find duplicate
- Export
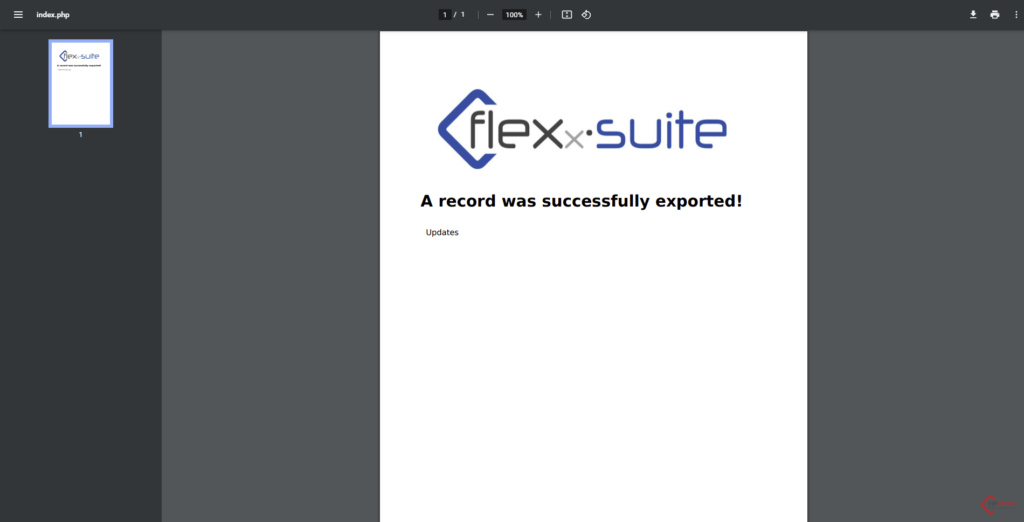
For example lets select a Generate PDF option for the Updates record in Documents module
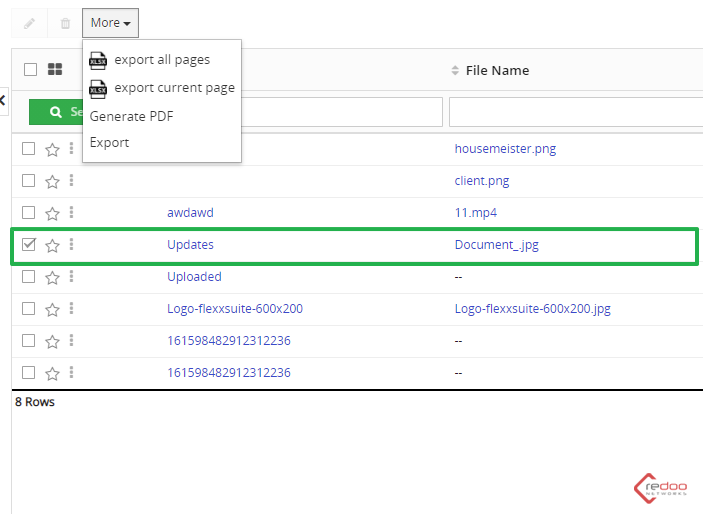
The “Select PDF Template” window will open and here you are able to select a PDF template
As you have selected a template press the button “Export PDF” to export

Then a PDF will be created and you can download it on your device
Merging Records
When you select two records a special feature opens and you can merge these records
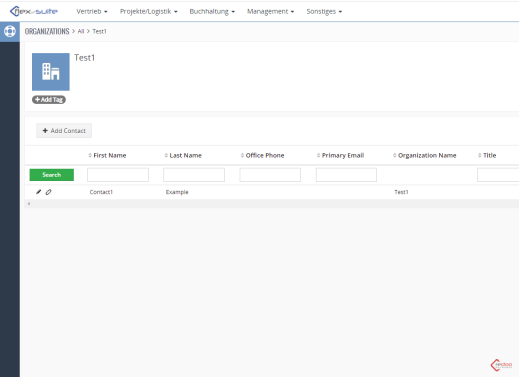
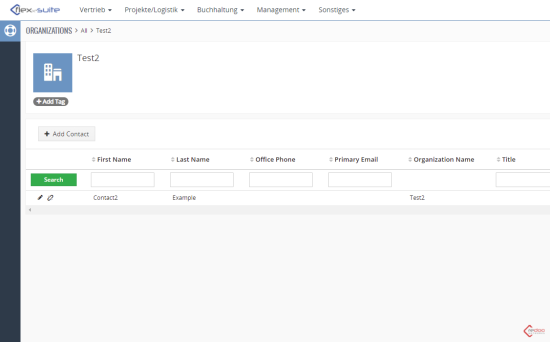
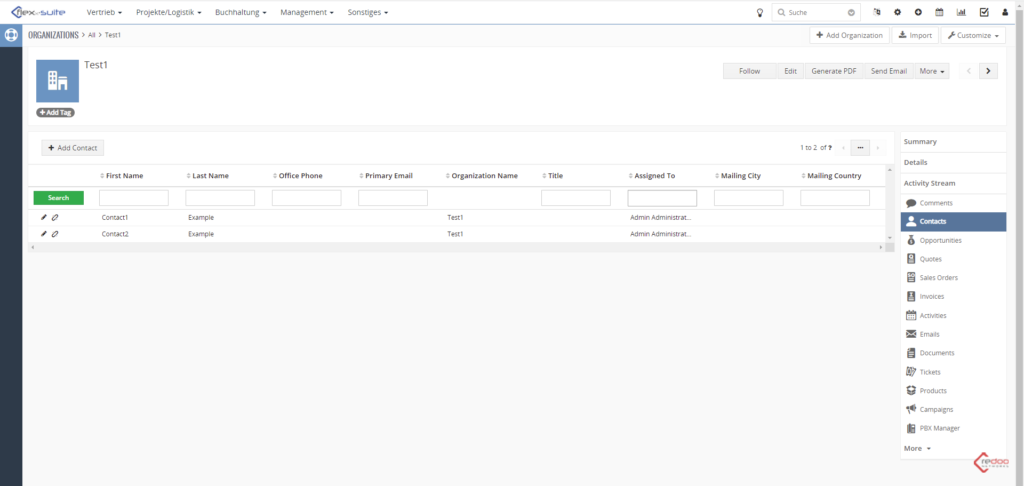
In this case we will merge records Test1 and Test2
The Test1 record has one Contact named Contact1, when the Test2 has a Contact2
After the merge both of these contacts should belong to one record
After you select Merge selected records a window opens where you select the primary record that will be retained after the merge. You can select the column to retain the values. The other record will be deleted but the related information will be merged.
In this case I select the Test1 record which will inherit contacts from the Test2 record

After that press the green Merge button below
Now we can see that both contacts belong to the Test1 record while the Test2 record is deleted, but its contact is inherited by another record
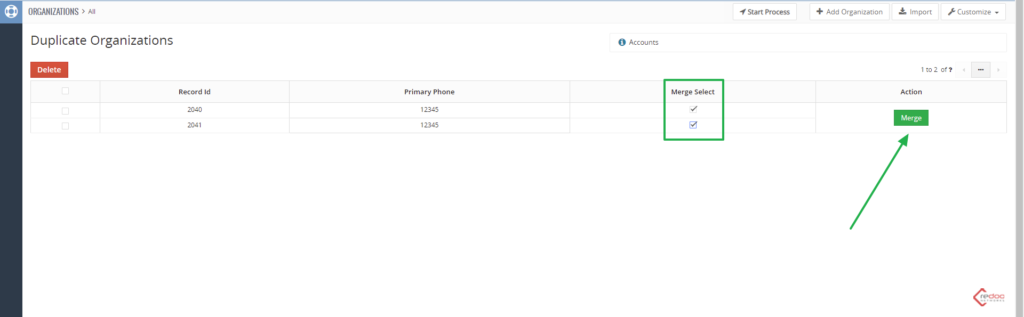
Duplicates Merging
Flexx Suite has a feature to find duplicates of different records
This feature is useful to find the same fields within two or more number of records
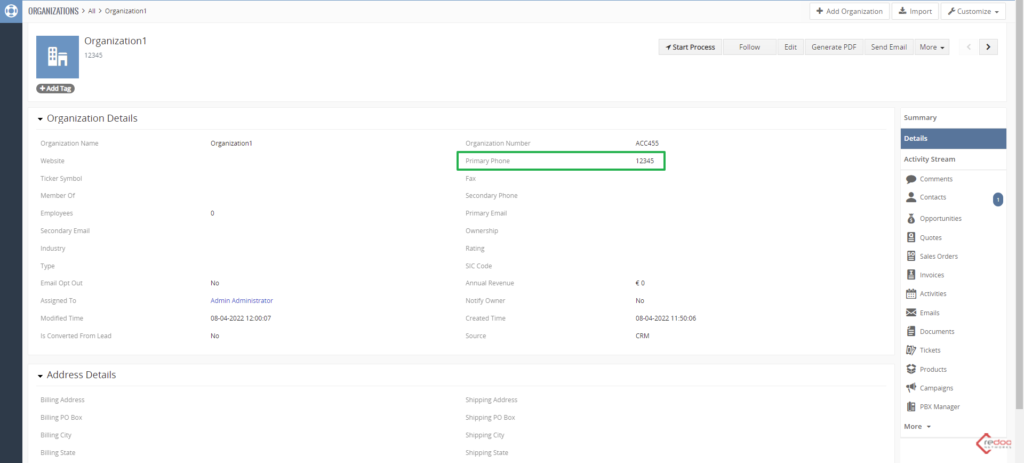
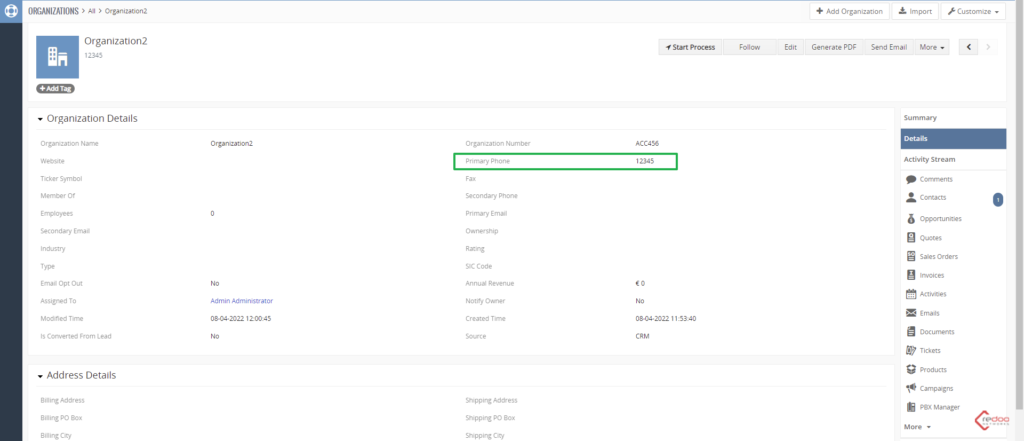
As an example lets look at these two Organization records which have the same Primary Phone number
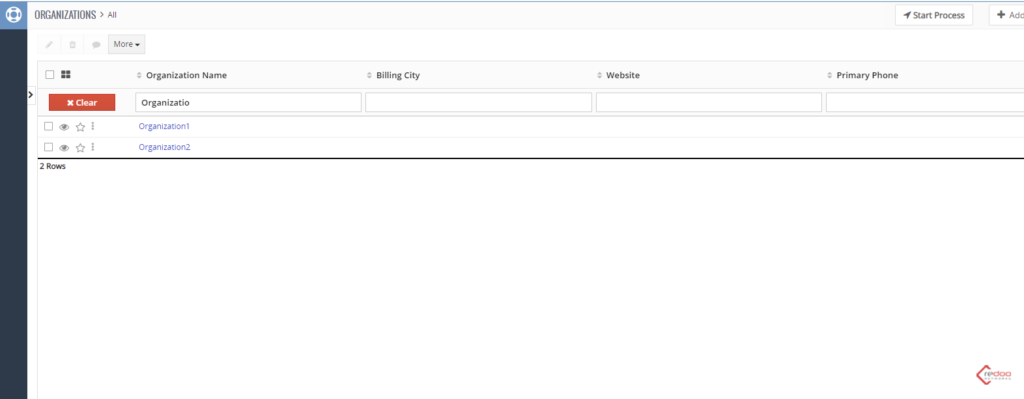
To find a duplicate firstly you have to select records which you want to compare (in this case Organization1 and Organization2)
After you selected records you want to compare use “More” button and choose “Find Duplicates” from the list

In the opened up window select fields you would like to compare (you can select one or multiple number of fields)
To continue press “Find Duplicates” ones you choose fields to compare

After that you will see a list of all Duplicates within records you chose
Select which duplicates you would like to merge and press the green “Merge” button on the right
Right after you will be taken to the Merge page when you have to select a record which will inherit all data from the other, from those who have duplicates
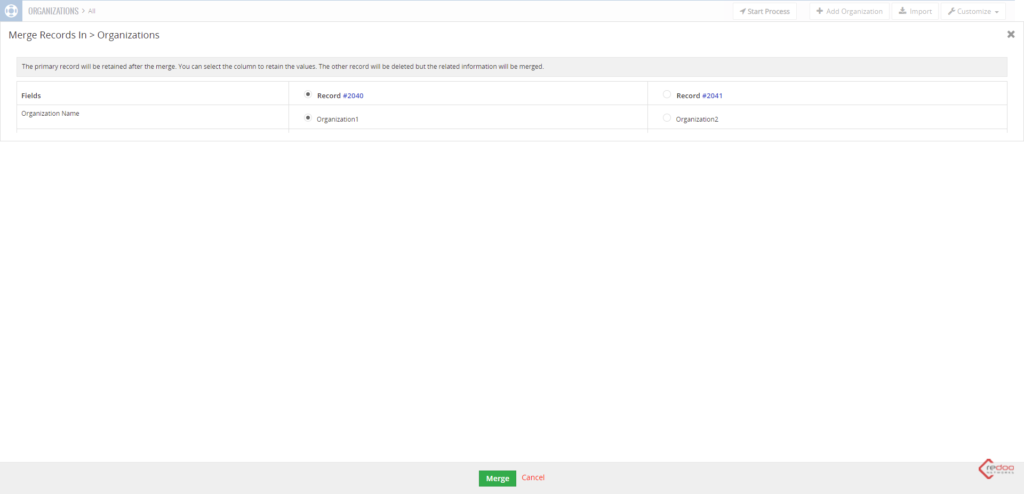
After the merge a duplicate will be deleted and the other record will stay, with all information and related records inherited from the duplicate.