With the help of the OCR functionality you can automatically recognize your uploaded invoices and receipts and assign the fields in the cashbook accordingly.
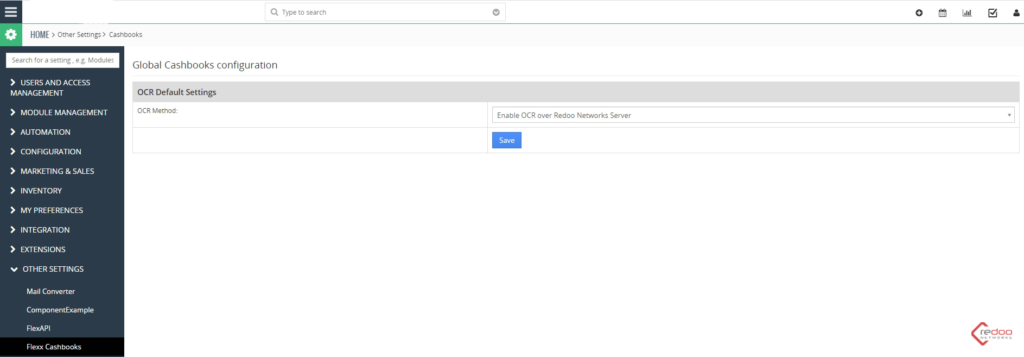
You need to specify an endpoint URL for the OCR functionality in the Settings menu.
Select “Create new cash book” and make the appropriate entries.

Now activate the Enable OCR text recognition function.
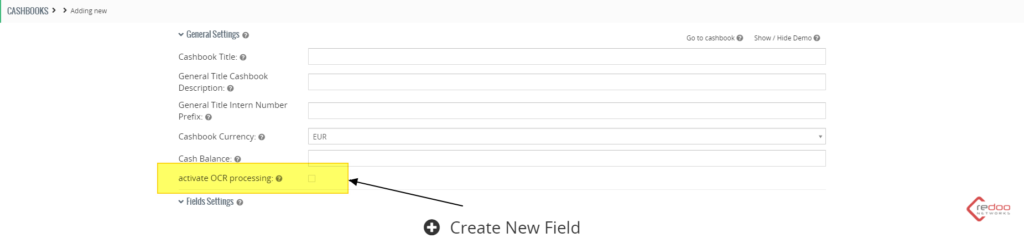
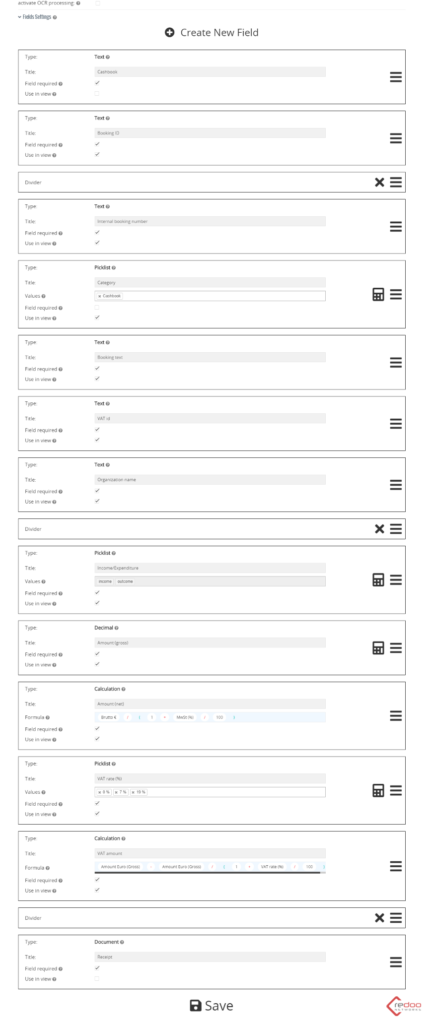
Now define your desired cash journal fields.
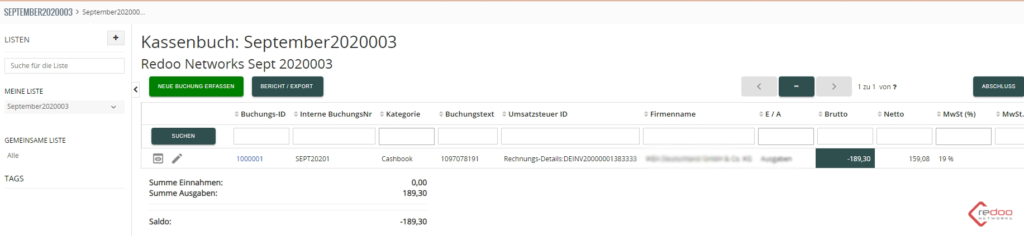
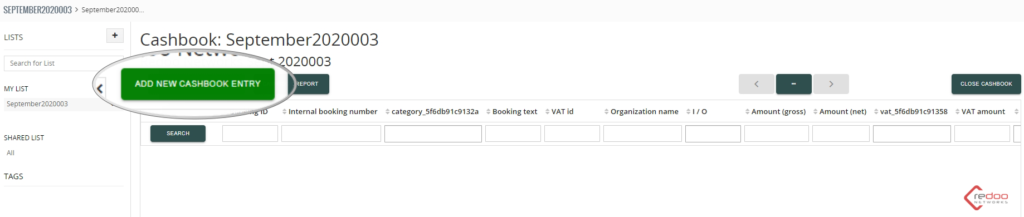
In your created cash book you can now enter your desired entries by clicking the “Enter new entry” button.
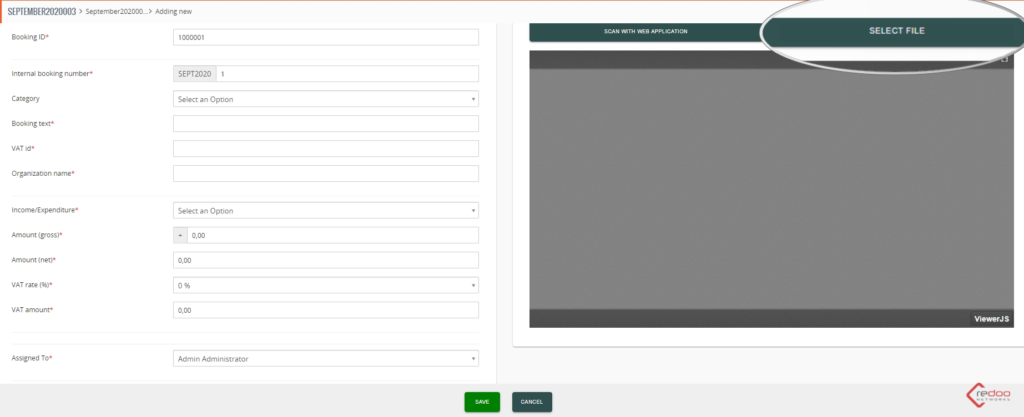
In this interface select the “Select Document” button and load the desired document from your device into the interface.
The OCR functionality now checks which entries can be transferred directly.
The better the quality of your first document, the more precisely the OCR functionality can transfer the desired data.
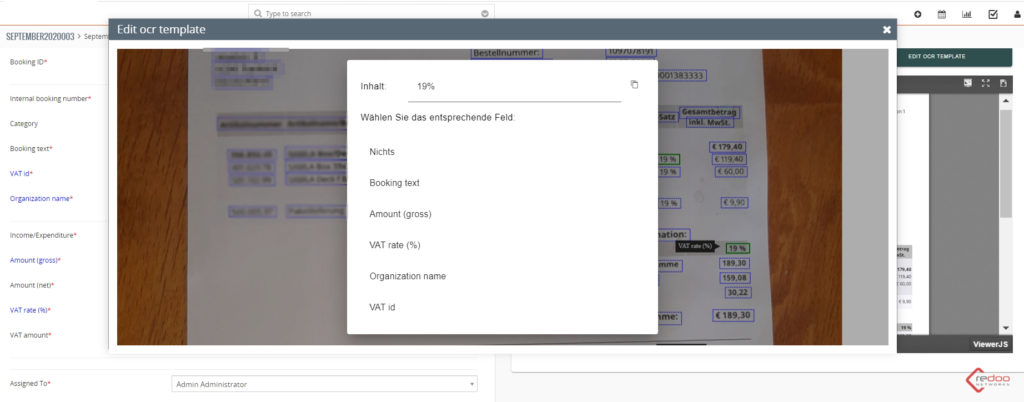
If any fields remain open, you can assign them via “Edit OCR template”.
To do this, select the desired field on your document and assign this to an OCR field.
Check the entries of the OCR functionality and complete your booking by clicking the “Save” button.
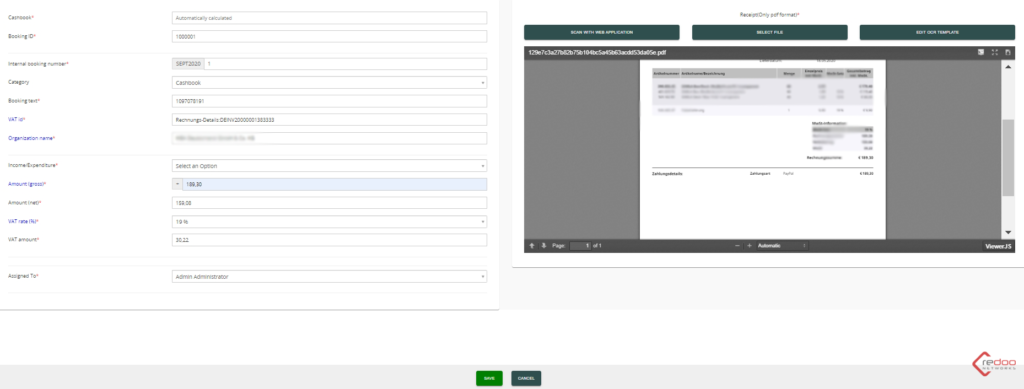
Your entry will now appear in your cash book.